DIY Guide: Clean Refrigerator Coils for Efficiency
Refrigerators play a crucial role in our daily lives, and keeping them well-maintained ensures optimal performance and energy efficiency. One often overlooked yet essential maintenance task is cleaning the refrigerator coils. In this guide, we’ll walk you through the steps to clean refrigerator coils on your own, promoting efficiency and extending the lifespan of your appliance.
Understanding the Importance of Clean Coils
Refrigerator coils, located either at the back or underneath the appliance, dissipate heat, allowing the refrigerator to maintain a cool temperature. Over time, these coils accumulate dust, dirt, and pet hair, hindering heat dissipation. Cleaning the coils is vital for the refrigerator’s efficiency, preventing overheating and reducing energy consumption.
Safety First: Unplug the Refrigerator
Before beginning the cleaning process, ensure your safety by unplugging the refrigerator from the power source. This precautionary measure prevents any electrical accidents while you work on the coils. Additionally, if the coils are at the back of the refrigerator, carefully pull the appliance away from the wall, providing easier access.
Locating and Assessing the Coils
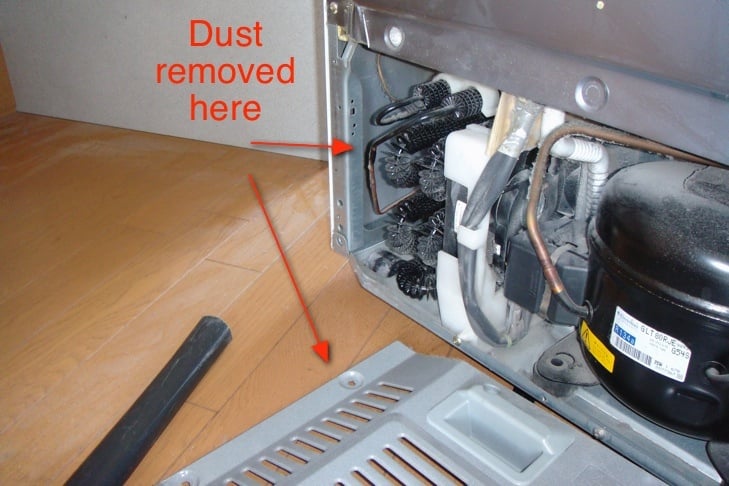
Once the refrigerator is unplugged and accessible, locate the coils. Depending on your refrigerator model, you’ll find the coils either at the back, behind a panel, or underneath the appliance. Take a moment to assess the level of dirt and debris on the coils, as this will guide your cleaning approach.
Gathering the Necessary Tools
Cleaning refrigerator coils doesn’t require a plethora of tools; a few simple items will suffice. Grab a vacuum cleaner with a narrow nozzle attachment, a long-handled brush, and a cloth. These tools will help you remove dust and debris effectively without causing damage to the coils.
Removing Loose Debris with a Brush
Start the cleaning process by using a long-handled brush to gently loosen and dislodge any accumulated dust and debris from the coils. Work carefully to avoid bending or damaging the coils. The goal at this stage is to eliminate loose particles that may hinder the vacuuming process.
Vacuuming the Coils Thoroughly
Once you’ve brushed off the loose debris, use a vacuum cleaner with a narrow nozzle attachment to effectively remove the remaining dust and dirt. Slowly and methodically pass the vacuum over the coils, ensuring you reach all areas. Pay extra attention to corners and crevices where debris may be concentrated.
Wiping Down the Coils with a Cloth
For a final touch, dampen a cloth with a mixture of water and mild dish soap. Gently wipe down the coils to remove any residual dirt or grease. This step not only enhances the cleanliness of the coils but also leaves a fresh surface that promotes better heat dissipation.
Cleaning the Floor and Surrounding Area
As you complete the coil cleaning process, take a moment to clean the floor and the surrounding area. Dust and debris that accumulate on the floor can find their way back to the coils, so keeping the entire area clean contributes to long-term maintenance.
Plugging In and Moving the Refrigerator Back
With the coils cleaned and the surrounding area tidied up, it’s time to plug the refrigerator back into the power source. Carefully move the appliance back into its original position, ensuring it’s level and stable. Once plugged in, allow the refrigerator to cool down before returning perishables.
Regular Maintenance for Optimal Performance
Cleaning refrigerator coils is not a one-time task. To ensure optimal performance and energy efficiency, make it a habit to clean the coils at least twice a year. This regular maintenance routine prevents excessive buildup and extends the life of your refrigerator.
Explore Fund Your Purpose for More DIY Insights
For additional DIY insights and home maintenance tips, visit Fund Your Purpose. The platform provides valuable resources to empower you in various DIY endeavors. Whether you’re tackling appliance maintenance or other household projects, Fund Your Purpose is your go-to source for practical insights and expert advice.


