Introduction:
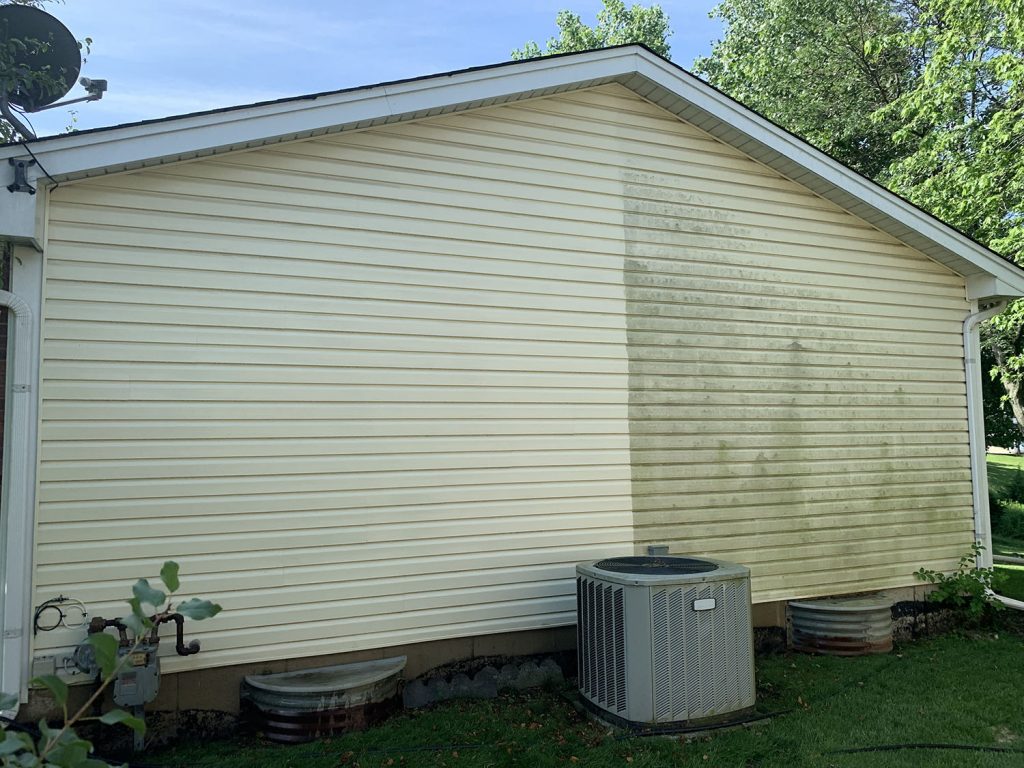
Revitalizing the exterior siding of your home is a rewarding DIY project that can enhance curb appeal and protect against the elements. Power washing is a highly effective method to achieve a fresh and clean look. In this guide, we’ll explore the step-by-step process of power washing exterior siding for an impressive transformation.
Selecting the Right Power Washer:
Before diving into the project, it’s essential to choose the right power washer. Opt for a machine with an appropriate PSI (pounds per square inch) for house siding. A pressure washer with a range of 1,500 to 2,400 PSI is generally suitable for most siding materials. Additionally, ensure the nozzle has a wide spray pattern to cover larger areas efficiently.
Prepping the Area:
Begin by prepping the area around your home. Cover plants, shrubs, and delicate landscaping with plastic sheeting to protect them from the force of the power washer and any cleaning solutions used. Secure electrical outlets and take necessary precautions to prevent water from entering the home.
Applying Cleaning Solutions:
For optimal results, consider applying a cleaning solution to the siding before power washing. Use a mixture of water and a siding cleaner specifically designed for power washing. Apply the solution from the bottom up to prevent streaking, and allow it to sit for a few minutes to loosen dirt and grime.
Testing Pressure and Technique:
Before starting the full power wash, test the pressure and technique on an inconspicuous area. Adjust the pressure to ensure it effectively removes dirt without causing damage. Hold the spray wand at a 45-degree angle and maintain a consistent distance from the siding to achieve an even and thorough clean.
Power Washing in Sections:
Divide the exterior into manageable sections for a systematic approach. Start from the bottom and work your way up to avoid streaking. Keep a steady and controlled motion, overlapping each pass slightly. Pay extra attention to areas with heavy staining or mildew buildup. Take breaks to assess your progress and adjust technique if needed.
Rinsing and Post-Cleaning Inspection:
After power washing each section, thoroughly rinse the siding to remove cleaning solutions and loosened debris. Inspect the results and assess whether additional cleaning or attention to specific areas is necessary. If stubborn stains persist, consider spot-cleaning with a soft brush or repeating the power wash process.
Caring for Sensitive Siding Materials:
Certain siding materials, such as wood or vinyl, may require special care. Use lower pressure settings for wood siding to prevent damage. For vinyl siding, avoid using excessive pressure or hot water, as it may cause warping. Always refer to the manufacturer’s recommendations for cleaning and maintenance.
Drying Time and Final Inspection:
Allow sufficient time for the siding to dry completely before evaluating the final results. Check for any spots that may have been missed or areas requiring additional attention. Drying time may vary based on weather conditions, so be patient and conduct a thorough final inspection.
Sealing and Protecting:
Consider applying a protective sealant or coating after power washing to safeguard the siding and extend its longevity. This step is particularly beneficial for wood siding. Choose a product compatible with your siding material and follow the manufacturer’s instructions for application.
Power Wash Exterior Siding DIY:
Elevate your home’s curb appeal with a DIY power wash for exterior siding. Following these steps ensures a professional-grade clean that enhances the beauty and durability of your home. Take pride in your DIY prowess and enjoy the fresh, revitalized look of your exterior.
Conclusion:
Power washing exterior siding is a transformative DIY project that rejuvenates the appearance of your home. With the right equipment, preparation, and technique, you can achieve professional results and protect your siding against the elements. Embrace the satisfaction of revitalizing your home’s exterior with this effective and rewarding DIY endeavor.