Introduction
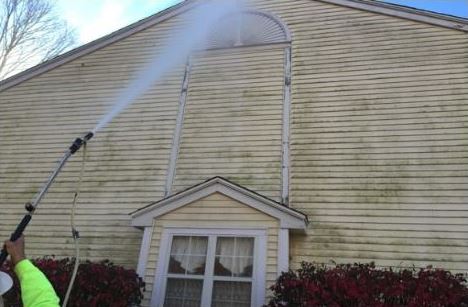
Revitalizing your home siding through DIY power washing is a rewarding and cost-effective way to enhance your property’s curb appeal. In this article, we’ll guide you through the steps of power washing your home siding, providing valuable tips to ensure a successful and rejuvenating process. Discover how this simple DIY task can make a significant difference in the appearance of your home.
Gathering Essential Equipment
Before embarking on your DIY power washing project, it’s crucial to gather the necessary equipment. Invest in a high-quality pressure washer suitable for residential use. Additionally, ensure you have safety gear such as goggles and gloves to protect yourself during the process. Having the right equipment sets the foundation for a successful and efficient power washing experience.
Inspecting and Repairing Siding
Begin the process by thoroughly inspecting your home siding. Identify any areas that may need repairs or replacement. Power washing can be intense, and it’s essential to address any existing issues before starting. Repairing loose or damaged siding ensures a smooth and uniform appearance after the power washing is complete.
Applying Cleaning Solutions
To maximize the effectiveness of your power washing, consider applying a cleaning solution to the siding. Mix a solution of water and a mild detergent or a specialized siding cleaner. Apply the solution using a garden sprayer or the pressure washer itself. Allow the cleaning solution to sit for a short period to break down dirt, mildew, and other contaminants on the siding.
Setting Up the Pressure Washer
Properly setting up the pressure washer is key to achieving the desired results. Adjust the pressure settings based on the type of siding you have, as different materials may require varying levels of pressure. Start with a lower pressure setting and gradually increase if necessary. Test the pressure washer on a small, inconspicuous area to ensure it won’t cause damage.
Maintaining Proper Technique
When power washing your home siding, maintaining the right technique is crucial. Hold the pressure washer nozzle at a slight downward angle to prevent water from getting behind the siding. Keep a consistent distance from the siding to ensure even cleaning. Move in smooth, overlapping strokes, working from top to bottom to avoid streaking.
Addressing Stubborn Stains and Mold
Some stains and mold may require extra attention. For stubborn stains, consider using a soft brush or a cloth in conjunction with the pressure washer to gently scrub the affected areas. Mold or mildew may require a mixture of water and vinegar or hydrogen peroxide. Always follow safety guidelines and wear protective gear when using cleaning solutions.
Rinsing Thoroughly
After applying the cleaning solution and power washing the siding, it’s essential to rinse thoroughly. Use clean water and the pressure washer to remove any remaining cleaning solution and loosened debris. Rinsing ensures a clean and residue-free surface, leaving your home siding looking refreshed and revitalized.
Drying and Inspecting
Allow the freshly power-washed siding to dry completely before inspecting the results. Take this time to ensure that all areas are clean and free from streaks or residue. Drying also provides an opportunity to assess the overall condition of your siding and address any additional maintenance or repairs needed.
Adding Finishing Touches
Once your home siding is clean and dry, consider adding finishing touches to enhance its appearance. This may include touching up paint, replacing damaged trim, or adding new landscaping elements. These small additions can complement the refreshed siding, creating a polished and well-maintained exterior.
Conclusion
DIY power washing for your home siding is a rewarding project that can transform the look of your property. By following these steps and taking the time to prepare and execute the process properly, you can achieve professional-quality results. For more home improvement tips and DIY projects, visit FundYourPurpose.org.


