Introduction
Maintaining your refrigerator is essential for efficient operation and energy savings. One often overlooked but crucial task is cleaning the refrigerator coils. In this DIY guide, we’ll explore the importance of clean coils, the steps to do it yourself, and the benefits it brings to your appliance and energy bills.
Understanding Refrigerator Coils
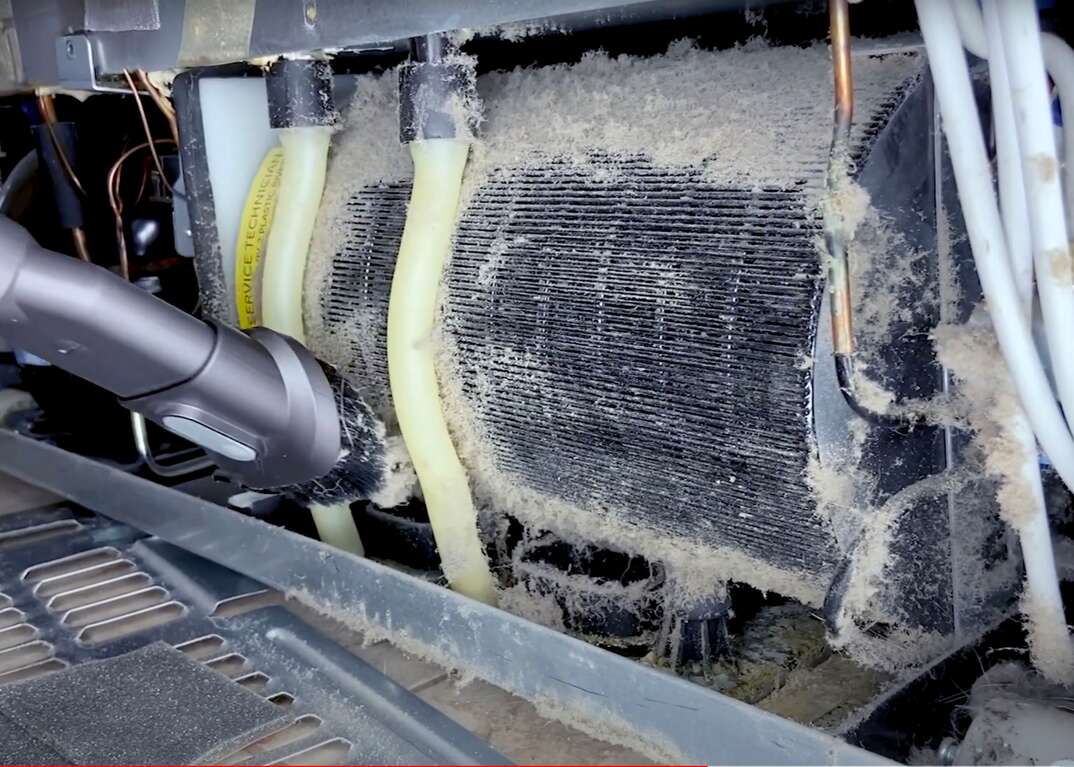
Refrigerator coils, located either on the back or underneath the appliance, are responsible for releasing heat and allowing the refrigerant to cool down. Over time, these coils accumulate dust, dirt, and pet hair, hindering their ability to dissipate heat efficiently. When the coils are dirty, the refrigerator works harder, leading to increased energy consumption and potential malfunctions.
Gathering the Necessary Tools
Cleaning your refrigerator coils is a straightforward process that requires minimal tools. To get started, you’ll need a vacuum cleaner with a narrow nozzle attachment, a refrigerator coil brush, and a damp cloth. These tools will help you remove dust and debris from the coils without causing damage to the appliance.
Locating and Accessing the Coils
Before you begin, unplug the refrigerator for safety. The location of the coils depends on your refrigerator model. For units with coils on the back, you may need to pull the refrigerator away from the wall to access them. If the coils are underneath, you can typically access them by removing the grille or kick plate at the front of the refrigerator.
Vacuuming Away Loose Debris
Start by using the vacuum cleaner with the narrow nozzle attachment to remove loose debris from the coils. Gently vacuum in and around the coils, paying attention to the spaces between the coils. Be thorough in your cleaning, as removing loose dirt is the first step in improving the coils’ efficiency.
Brushing and Detail Cleaning
After vacuuming, use the refrigerator coil brush to dislodge any stubborn dust or dirt stuck between the coils. The brush’s bristles can reach areas that the vacuum may have missed. Work methodically, covering the entire surface of the coils. Once you’ve brushed away as much dirt as possible, use a damp cloth to wipe down the coils and ensure a clean finish.
Cleaning the Surrounding Area
While you have the refrigerator pulled away from the wall or the kick plate removed, take the opportunity to clean the surrounding area. Dust and debris can accumulate in these spaces and affect the coils’ efficiency. Wipe down the floor and any exposed parts of the refrigerator’s back or bottom.
Reassembling and Testing
After cleaning, reassemble the refrigerator by pushing it back into place or reinstalling the kick plate. Plug the appliance back in and allow it to run for a few hours. Monitor its performance, and you should notice improved cooling efficiency and reduced energy consumption.
Benefits of Clean Coils
Regularly cleaning your refrigerator coils provides several benefits. Firstly, it helps maintain the appliance’s energy efficiency, reducing your electricity bills. Secondly, clean coils contribute to the longevity of your refrigerator by preventing overheating and potential breakdowns. Lastly, a well-maintained refrigerator operates more quietly, enhancing your overall kitchen experience.
Incorporating Coil Cleaning into Routine Maintenance
Make refrigerator coil cleaning a part of your routine home maintenance. Aim to clean the coils at least twice a year, or more frequently if you have pets that shed, as pet hair can accumulate quickly. By incorporating this simple task into your regular maintenance routine, you ensure that your refrigerator operates at its best year-round.
Conclusion
Cleaning your refrigerator coils on your own is a cost-effective and straightforward way to enhance the efficiency and longevity of your appliance. With minimal tools and a bit of time, you can contribute to energy savings and reduce the risk of malfunctions. For more home maintenance tips and DIY guides, visit FundYourPurpose.org.


