Upgrade Your Bathroom: Mastering the Art of Toilet Replacement
Replacing a toilet may seem like a daunting task, but with the right guidance, it can be a rewarding DIY project that transforms your bathroom. In this comprehensive guide, we’ll take you through the steps of replacing a toilet, from preparation to installation, ensuring a successful upgrade.
Assessing the Need for Replacement: Signs of an Aging Toilet
Before diving into the replacement process, it’s crucial to assess whether your toilet genuinely needs an upgrade. Signs of an aging toilet include frequent leaks, cracks in the porcelain, persistent clogs, or a wobbly bowl. If you notice any of these issues, it might be time to consider replacing your toilet for improved functionality.
Choosing the Right Toilet: Factors to Consider
Selecting the right toilet is a crucial step in the replacement process. Consider factors such as bowl shape, flushing mechanism, and water efficiency. Measure the rough-in – the distance between the wall and the center of the drain – to ensure the new toilet fits your bathroom layout seamlessly. Choose a toilet that aligns with both your preferences and the practicalities of your space.
Gathering Tools and Materials: Preparing for the Project
Before starting the replacement, gather the necessary tools and materials. You’ll likely need an adjustable wrench, a putty knife, a wax ring, bolts, and, of course, the new toilet. Having everything on hand streamlines the process and ensures a smooth transition from removing the old toilet to installing the new one.
Removing the Old Toilet: Step-by-Step Process
Begin the removal process by turning off the water supply to the toilet and flushing to empty the tank. Disconnect the water supply line and remove any remaining water from the bowl with a sponge. Loosen the bolts securing the toilet to the floor and carefully lift the old toilet away. Scrape off the old wax ring and inspect the flange for any damage.
To learn more about the toilet replacement process, visit Replace a Toilet.
Preparing the Area for Installation: Cleaning and Inspecting
With the old toilet removed, take the time to clean the flange thoroughly and inspect it for any issues. Ensure the flange is level and firmly secured to the floor. Clean the area around the flange to provide a clean and stable foundation for the new toilet.
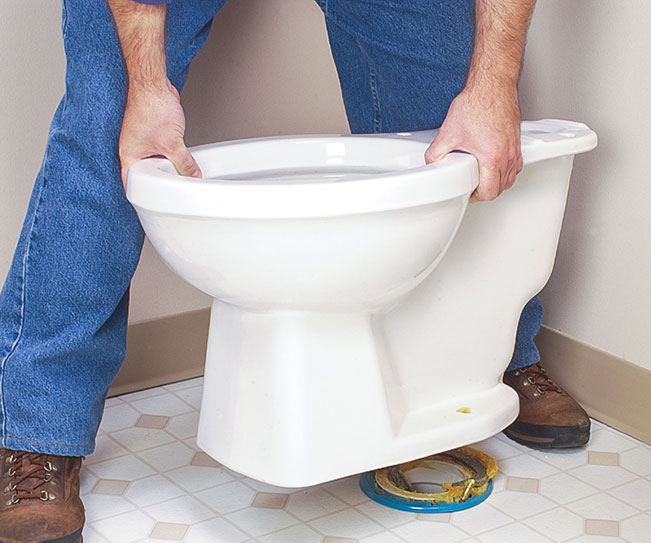
Installing the New Toilet: Step-by-Step Guide
Begin the installation process by placing a new wax ring onto the flange, ensuring it is centered around the drain opening. Carefully lower the new toilet bowl onto the wax ring, aligning the mounting bolts with the flange slots. Gently press the toilet bowl into place, and then secure it by tightening the nuts onto the bolts. Attach the tank to the bowl following the manufacturer’s instructions, and connect the water supply line.
Testing for Leaks and Ensuring Stability: Final Checks
Once the new toilet is installed, turn on the water supply and fill the tank. Flush the toilet several times to check for any leaks and ensure proper functionality. Inspect the toilet for stability – it should sit firmly on the floor without any wobbling. Make any necessary adjustments to the bolts or wax ring to achieve a secure and leak-free installation.
Sealing Gaps and Finishing Touches: Aesthetic Considerations
To complete the replacement process, apply a bead of caulk around the base of the toilet to seal any gaps and create a polished finish. Trim the excess caulk for a clean appearance. Consider upgrading the toilet seat for a fresh look and added comfort, completing the aesthetic aspect of your toilet replacement.
Disposing of the Old Toilet: Environmentally Friendly Options
Dispose of the old toilet responsibly by checking with local waste management services for recycling or disposal options. Many municipalities have programs for recycling porcelain fixtures, contributing to environmental sustainability.
Conclusion: Enjoying the Fruits of Your Labor
Replacing a toilet may seem like a substantial task, but with careful planning and execution, it becomes a manageable and rewarding DIY project. By following these step-by-step guidelines, you can upgrade your bathroom, enhance functionality, and enjoy a fresh and modern toilet for years to come.