.jpg "Elevate Your Outdoor Space with Modern Backyard Furniture")


Introduction:
Maintaining pristine walls is a key aspect of home upkeep, and patching a hole in the wall is a common DIY task that every homeowner should master. In this guide, we’ll walk you through practical and straightforward solutions to effectively patch a hole in your wall, restoring its aesthetics seamlessly.
Assessing Hole Size and Type:
Before diving into the repair process, it’s crucial to assess the size and type of hole you’re dealing with. Small nail holes require a different approach than larger holes left by accidents or furniture bumps. Understanding the nature of the hole will guide you in selecting the appropriate patching method.
Gathering Necessary Materials:
For most small to medium-sized holes, you’ll need a few basic materials: spackle or joint compound, a putty knife, fine-grit sandpaper, and paint that matches your wall color. For larger holes, a wall repair kit or a piece of drywall, joint tape, and a utility knife may be necessary.
Patching Small Nail Holes:
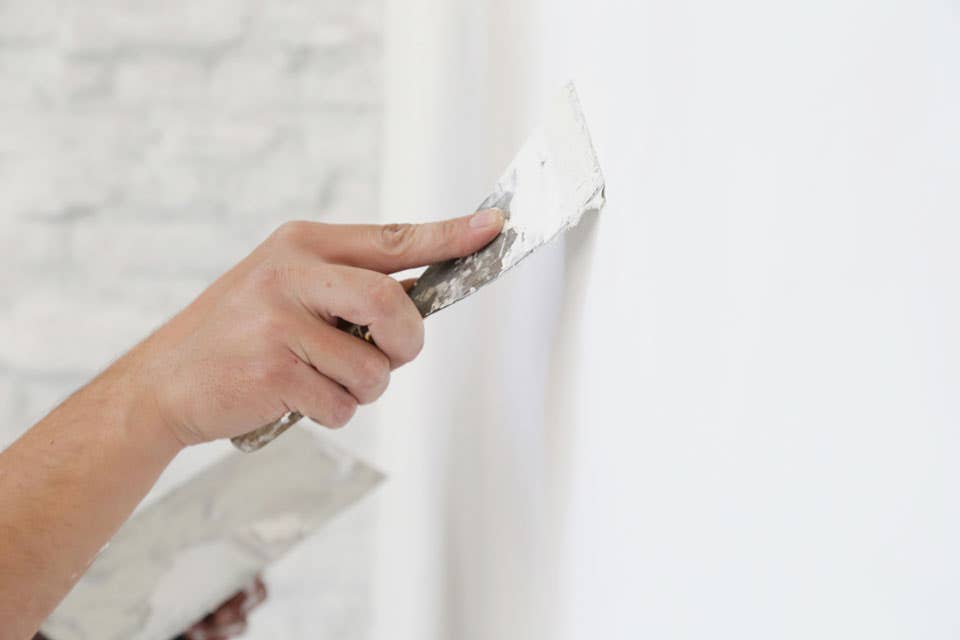
For small nail holes, the process is relatively simple. Use a putty knife to apply a small amount of spackle or joint compound over the hole. Smooth it out, let it dry, and then lightly sand the patched area. Once smooth, you can paint over the repaired spot. This quick fix is ideal for minor wall blemishes.
Repairing Medium-Sized Holes:
For medium-sized holes, the process involves slightly more effort. Start by cleaning the hole area and removing any loose debris. Apply a wall repair patch or a piece of drywall cut to fit the hole. Secure it in place with joint compound or spackle, ensuring a smooth surface. Once dry, sand and paint the patched area to blend seamlessly with the rest of the wall.
Addressing Large Holes:
Repairing larger holes requires a more comprehensive approach. Begin by cutting the hole into a clean, rectangular shape using a utility knife. Measure and cut a piece of drywall to fit the hole, securing it with screws or adhesive. Use joint tape and joint compound to cover the seams, feathering the edges for a smooth finish. Sand and paint the repaired area to match the surrounding wall.
Covering Holes with Mesh Patches:
Mesh patches are handy for reinforcing repairs, especially for larger holes. Apply the mesh patch over the hole, securing it with joint compound. Once the compound dries, sand the patched area for a smooth finish. This method provides extra support and stability to the repaired wall section.
Ensuring Proper Dry Time:
Patience is key in wall patching. Allow each layer of spackle, joint compound, or adhesive to dry thoroughly before moving on to the next step. Rushing the process may result in an uneven surface, affecting the quality of the repair.
Sanding for a Smooth Finish:
Sanding is a crucial step to achieve a flawless finish. Use fine-grit sandpaper to smooth the patched area, blending it seamlessly with the rest of the wall. Be gentle to avoid creating new imperfections, and wipe away any dust before applying paint.
Painting to Match the Wall:
The final touch is painting the patched area to match the surrounding wall. Use the same color and finish as the existing paint, ensuring a cohesive look. Apply the paint evenly over the patched section, feathering the edges for a seamless transition.
Camouflaging the Patch:
To further conceal the patch, consider using textured paint or applying a faux finish that mimics the surrounding wall. These techniques help hide any subtle variations and create a cohesive appearance.
Celebrating a Job Well Done:
Patching a hole in the wall is a rewarding DIY task that enhances the overall aesthetics of your home. With the right materials, techniques, and attention to detail, you can achieve a flawless repair and enjoy walls that look as good as new.
Conclusion:
Mastering the art of patching a hole in the wall is a valuable skill for any homeowner. Whether dealing with small nail holes or more substantial wall damage, the key is to approach the repair process with care and precision. With these practical steps, you can confidently tackle wall repairs, maintaining the beauty and integrity of your living spaces.