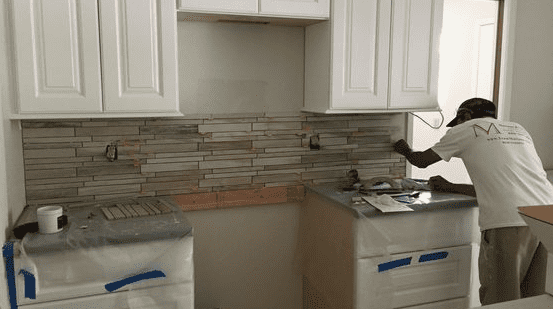
Enhance Your Kitchen Aesthetics: A Comprehensive Guide to Installing a Backsplash
When it comes to transforming the look and feel of your kitchen, installing a backsplash is a game-changer. Not only does it add a touch of style to the space, but it also serves a practical purpose by protecting your walls from stains and splatters. In this guide, we will walk you through the process of installing a backsplash, from choosing the right materials to completing the installation.
Choosing the Right Backsplash Material
The first step in the installation process is selecting the right material for your backsplash. There are various options available, each with its own unique characteristics and aesthetic appeal. Popular choices include ceramic tiles, glass tiles, subway tiles, and even peel-and-stick options for a hassle-free installation. Consider the overall design of your kitchen and your personal preferences when making this decision.
Measuring and Preparing the Wall Surface
Before you start the installation, it’s crucial to measure the area accurately to determine the amount of material needed. Once you have your measurements, prepare the wall surface by cleaning it thoroughly and ensuring it’s smooth and free from any debris. A clean and well-prepared surface is essential for a seamless and long-lasting installation.
Laying Out the Design and Pattern
Once your surface is ready, it’s time to plan the layout of your backsplash. Consider the size and shape of your tiles and how they will fit together. Experiment with different patterns and designs to find the one that complements your kitchen style. You can create a classic subway tile pattern, go for a herringbone design, or even mix and match different tile shapes for a more eclectic look.
Applying Adhesive and Setting the Tiles
With your design in mind, apply the adhesive to the wall using a trowel. Make sure to spread it evenly to ensure a strong bond. Carefully set each tile in place, following your chosen pattern. Use spacers to maintain consistent gaps between the tiles for grout later. Take your time during this step to ensure precision and a professional finish.
Grouting the Tiles
Once the adhesive has dried and the tiles are set in place, it’s time to apply the grout. Choose a grout color that complements your tiles and overall kitchen design. Using a rubber float, spread the grout over the tiles, making sure to fill all the gaps. Wipe away excess grout with a damp sponge, and let it cure according to the manufacturer’s instructions.
Sealing the Grout (Optional)
For added protection against stains and moisture, consider sealing the grout once it’s fully cured. Sealing helps maintain the grout’s color and prevents it from absorbing liquids that could lead to discoloration over time. While sealing is optional, it’s a recommended step to prolong the life and appearance of your backsplash.
Final Touches and Clean-Up
After the grout has fully cured and any sealer applied, it’s time for the final touches. Remove any remaining spacers, and inspect the backsplash for any visible imperfections. Clean the tiles and grout lines with a damp cloth to remove any leftover grout residue. Step back and admire your newly installed backsplash, transforming your kitchen into a stylish and functional space.
For additional tips and insights on installing a backsplash, you can visit Install a Backsplash.
Conclusion: Elevate Your Kitchen with a Stunning Backsplash
Installing a backsplash is a rewarding DIY project that can significantly enhance the aesthetic appeal of your kitchen. From choosing the right materials to completing the final touches, each step contributes to creating a stylish and functional space. Follow this comprehensive guide, and soon you’ll be enjoying a kitchen that reflects your personal style and stands out as the heart of your home.


