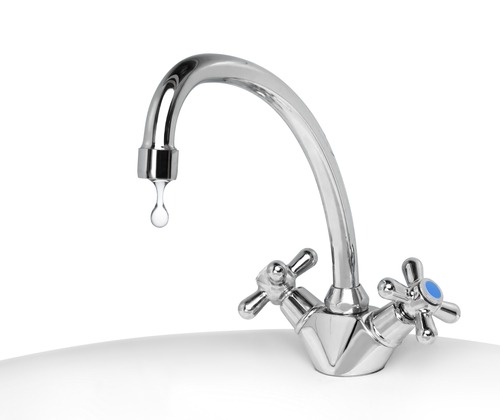
Introduction:
A leaky faucet not only wastes water but can also be an annoying household nuisance. Fear not; fixing a leaky faucet is a common DIY task that doesn’t require advanced plumbing skills. In this guide, we’ll walk you through practical solutions to repair a leaky faucet and regain control over your water usage.
Understanding Faucet Types:
Before diving into the repair process, it’s crucial to identify the type of faucet you have. The two main types are compression faucets and washerless faucets. Compression faucets typically have separate hot and cold handles and are more prone to leaks. Washerless faucets, including ball, cartridge, and ceramic disc faucets, are less prone to leaks but may still require maintenance.
Gathering Necessary Tools:
To fix a leaky faucet, gather the necessary tools: an adjustable wrench, screwdrivers, pliers, and a replacement O-ring or cartridge, depending on your faucet type. Turn off the water supply to the faucet before starting any repairs. This can usually be done by shutting off the water valves located beneath the sink.
Fixing a Compression Faucet:
For compression faucets, the most common cause of leaks is a worn-out rubber washer. To fix it, turn off the water supply, remove the faucet handle with a screwdriver, and access the valve stem. Replace the old washer with a new one of the same size, reassemble the faucet, and turn the water supply back on. If the leak persists, consider replacing the entire faucet.
Repairing Washerless Faucets:
For ball, cartridge, or ceramic disc faucets, leaks often result from worn-out O-rings, cartridges, or seals. Start by turning off the water supply and disassembling the faucet. Inspect the O-rings, cartridges, or seals for signs of wear or damage. Replace any faulty components with new ones, reassemble the faucet, and turn the water supply back on.
Dealing with Dripping Taps:
Dripping taps are a common issue and can often be resolved by tightening loose parts. Check for loose nuts or screws on the handle or faucet body. Use an adjustable wrench or pliers to tighten any loose components. If the dripping persists, it may be necessary to replace worn-out parts, such as the O-ring or cartridge.
Replacing a Faucet Cartridge:
If your faucet has a cartridge and is still leaking after replacing the O-ring, you may need to replace the entire cartridge. Remove the faucet handle, retaining nut, and old cartridge. Install the new cartridge according to the manufacturer’s instructions, reassemble the faucet, and turn the water supply back on.
Addressing Slow Water Flow:
In addition to leaks, slow water flow can be a common issue. Sediment buildup and mineral deposits in the aerator are often the culprits. Unscrew the aerator from the faucet spout, clean it thoroughly, and reattach it. This simple step can improve water flow and prevent future leaks.
Checking for Corroded Valve Seats:
Corroded valve seats can also contribute to leaks. To address this issue, remove the faucet handle and spout, and use a seat wrench to remove the old valve seat. Replace it with a new, matching valve seat, reassemble the faucet, and turn the water supply back on. This should resolve leaks caused by corroded valve seats.
Testing the Repairs:
After completing the repairs, thoroughly test the faucet for leaks and proper functionality. Turn the water supply back on and observe the faucet for any signs of dripping or irregularities. Run both hot and cold water to ensure that the repairs have successfully addressed the leak.
Knowing When to Seek Professional Help:
While many leaky faucet issues can be resolved through DIY efforts, there are instances where professional assistance may be necessary. If you encounter complex problems, struggle with identifying the faucet type, or if the issue persists despite your efforts, it’s advisable to consult a licensed plumber for expert assistance.
Fix a Leaky Faucet and Save Water:
Taking the time to fix a leaky faucet not only saves water but also prevents potential water damage and reduces utility bills. With the right tools and a bit of DIY know-how, you can successfully repair your faucet and enjoy a drip-free, efficient plumbing fixture.
Conclusion:
A leaky faucet is a common household annoyance, but with the right approach, it’s a problem that can be resolved without professional help. By identifying the faucet type, gathering the necessary tools, and following specific repair steps, you can tackle leaks and save water. Keep your plumbing in top shape and enjoy the satisfaction of a successfully repaired faucet.